Step-by-step walk-through
This guide will walk you through the core pieces of PyTorch Lightning.
We’ll accomplish the following:
Implement an MNIST classifier.
Use inheritance to implement an AutoEncoder
Note
Any DL/ML PyTorch project fits into the Lightning structure. Here we just focus on 3 types of research to illustrate.
From MNIST to AutoEncoders
Installing Lightning
Lightning is trivial to install. We recommend using conda environments
conda activate my_env
pip install pytorch-lightning
Or without conda environments, use pip.
pip install pytorch-lightning
Or conda.
conda install pytorch-lightning -c conda-forge
The research
The Model
The LightningModule holds all the core research ingredients:
The model
The optimizers
The train/ val/ test steps
Let’s first start with the model. In this case, we’ll design a 3-layer neural network.
import torch
from torch.nn import functional as F
from torch import nn
from pytorch_lightning.core.lightning import LightningModule

class LitMNIST(LightningModule):

  def __init__(self):
    super().__init__()

    # mnist images are (1, 28, 28) (channels, width, height)
    self.layer_1 = torch.nn.Linear(28 * 28, 128)
    self.layer_2 = torch.nn.Linear(128, 256)
    self.layer_3 = torch.nn.Linear(256, 10)

  def forward(self, x):
    batch_size, channels, width, height = x.size()

    # (b, 1, 28, 28) -> (b, 1*28*28)
    x = x.view(batch_size, -1)
    x = self.layer_1(x)
    x = F.relu(x)
    x = self.layer_2(x)
    x = F.relu(x)
    x = self.layer_3(x)

    x = F.log_softmax(x, dim=1)
    return x
Notice this is a LightningModule instead of a torch.nn.Module. A LightningModule is
equivalent to a pure PyTorch Module except it has added functionality. However, you can use it EXACTLY the same as you would a PyTorch Module.
net = LitMNIST()
x = torch.randn(1, 1, 28, 28)
out = net(x)
Out:
torch.Size([1, 10])
Now we add the training_step which has all our training loop logic
class LitMNIST(LightningModule):

    def training_step(self, batch, batch_idx):
        x, y = batch
        logits = self(x)
        loss = F.nll_loss(logits, y)
        return loss
Data
Lightning operates on pure dataloaders. Here’s the PyTorch code for loading MNIST.
from torch.utils.data import DataLoader, random_split
from torchvision.datasets import MNIST
import os
from torchvision import datasets, transforms

# transforms
# prepare transforms standard to MNIST
transform=transforms.Compose([transforms.ToTensor(),
                              transforms.Normalize((0.1307,), (0.3081,))])

# data
mnist_train = MNIST(os.getcwd(), train=True, download=True, transform=transform)
mnist_train = DataLoader(mnist_train, batch_size=64)
You can use DataLoaders in 3 ways:
1. Pass DataLoaders to .fit()
Pass in the dataloaders to the .fit() function.
model = LitMNIST()
trainer = Trainer()
trainer.fit(model, mnist_train)
2. LightningModule DataLoaders
For fast research prototyping, it might be easier to link the model with the dataloaders.
class LitMNIST(pl.LightningModule):

    def train_dataloader(self):
        # transforms
        # prepare transforms standard to MNIST
        transform=transforms.Compose([transforms.ToTensor(),
                                      transforms.Normalize((0.1307,), (0.3081,))])
        # data
        mnist_train = MNIST(os.getcwd(), train=True, download=True, transform=transform)
        return DataLoader(mnist_train, batch_size=64)

    def val_dataloader(self):
        transforms = ...
        mnist_val = ...
        return DataLoader(mnist_val, batch_size=64)

    def test_dataloader(self):
        transforms = ...
        mnist_test = ...
        return DataLoader(mnist_test, batch_size=64)
DataLoaders are already in the model, no need to specify on .fit().
model = LitMNIST()
trainer = Trainer()
trainer.fit(model)
3. DataModules (recommended)
Defining free-floating dataloaders, splits, download instructions, and such can get messy. In this case, it’s better to group the full definition of a dataset into a DataModule which includes:
Download instructions
Processing instructions
Split instructions
Train dataloader
Val dataloader(s)
Test dataloader(s)
class MyDataModule(LightningDataModule):

    def __init__(self):
        super().__init__()
        self.train_dims = None
        self.vocab_size = 0

    def prepare_data(self):
        # called only on 1 GPU
        download_dataset()
        tokenize()
        build_vocab()

    def setup(self):
        # called on every GPU
        vocab = load_vocab()
        self.vocab_size = len(vocab)

        self.train, self.val, self.test = load_datasets()
        self.train_dims = self.train.next_batch.size()

    def train_dataloader(self):
        transforms = ...
        return DataLoader(self.train, batch_size=64)

    def val_dataloader(self):
        transforms = ...
        return DataLoader(self.val, batch_size=64)

    def test_dataloader(self):
        transforms = ...
        return DataLoader(self.test, batch_size=64)
Using DataModules allows easier sharing of full dataset definitions.
# use an MNIST dataset
mnist_dm = MNISTDatamodule()
model = LitModel(num_classes=mnist_dm.num_classes)
trainer.fit(model, mnist_dm)

# or other datasets with the same model
imagenet_dm = ImagenetDatamodule()
model = LitModel(num_classes=imagenet_dm.num_classes)
trainer.fit(model, imagenet_dm)
Note
prepare_data() is called on only one GPU in distributed training (automatically)
Note
setup() is called on every GPU (automatically)
Models defined by data
When your models need to know about the data, it’s best to process the data before passing it to the model.
# init dm AND call the processing manually
dm = ImagenetDataModule()
dm.prepare_data()
dm.setup()

model = LitModel(out_features=dm.num_classes, img_width=dm.img_width, img_height=dm.img_height)
trainer.fit(model, dm)
use
prepare_data()to download and process the dataset.use
setup()to do splits, and build your model internals
An alternative to using a DataModule is to defer initialization of the models modules to the setup method of your LightningModule as follows:
class LitMNIST(LightningModule):

    def __init__(self):
        self.l1 = None

    def prepare_data(self):
        download_data()
        tokenize()

    def setup(self, step):
        # step is either 'fit' or 'test' 90% of the time not relevant
        data = load_data()
        num_classes = data.classes
        self.l1 = nn.Linear(..., num_classes)
Optimizer
Next we choose what optimizer to use for training our system. In PyTorch we do it as follows:
from torch.optim import Adam
optimizer = Adam(LitMNIST().parameters(), lr=1e-3)
In Lightning we do the same but organize it under the configure_optimizers() method.
class LitMNIST(LightningModule):

    def configure_optimizers(self):
        return Adam(self.parameters(), lr=1e-3)
Note
The LightningModule itself has the parameters, so pass in self.parameters()
However, if you have multiple optimizers use the matching parameters
class LitMNIST(LightningModule):

    def configure_optimizers(self):
        return Adam(self.generator(), lr=1e-3), Adam(self.discriminator(), lr=1e-3)
Training step
The training step is what happens inside the training loop.
for epoch in epochs:
    for batch in data:
        # TRAINING STEP
        # ....
        # TRAINING STEP
        loss.backward()
        optimizer.step()
        optimizer.zero_grad()
In the case of MNIST, we do the following
for epoch in epochs:
    for batch in data:
        # ------ TRAINING STEP START ------
        x, y = batch
        logits = model(x)
        loss = F.nll_loss(logits, y)
        # ------ TRAINING STEP END ------

        loss.backward()
        optimizer.step()
        optimizer.zero_grad()
In Lightning, everything that is in the training step gets organized under the
training_step() function in the LightningModule.
class LitMNIST(LightningModule):

    def training_step(self, batch, batch_idx):
        x, y = batch
        logits = self(x)
        loss = F.nll_loss(logits, y)
        return loss
Again, this is the same PyTorch code except that it has been organized by the LightningModule. This code is not restricted which means it can be as complicated as a full seq-2-seq, RL loop, GAN, etc…
The engineering
Training
So far we defined 4 key ingredients in pure PyTorch but organized the code with the LightningModule.
Model.
Training data.
Optimizer.
What happens in the training loop.
For clarity, we’ll recall that the full LightningModule now looks like this.
class LitMNIST(LightningModule):
    def __init__(self):
        super().__init__()
        self.layer_1 = torch.nn.Linear(28 * 28, 128)
        self.layer_2 = torch.nn.Linear(128, 256)
        self.layer_3 = torch.nn.Linear(256, 10)

    def forward(self, x):
        batch_size, channels, width, height = x.size()
        x = x.view(batch_size, -1)
        x = self.layer_1(x)
        x = F.relu(x)
        x = self.layer_2(x)
        x = F.relu(x)
        x = self.layer_3(x)
        x = F.log_softmax(x, dim=1)
        return x

    def training_step(self, batch, batch_idx):
        x, y = batch
        logits = self(x)
        loss = F.nll_loss(logits, y)
        return loss
Again, this is the same PyTorch code, except that it’s organized by the LightningModule.
Logging
To log to Tensorboard, your favorite logger, and/or the progress bar, use the
log() method which can be called from
any method in the LightningModule.
def training_step(self, batch, batch_idx):
    self.log('my_metric', x)
The log() method has a few options:
on_step (logs the metric at that step in training)
on_epoch (automatically accumulates and logs at the end of the epoch)
prog_bar (logs to the progress bar)
logger (logs to the logger like Tensorboard)
Depending on where the log is called from, Lightning auto-determines the correct mode for you. But of course you can override the default behavior by manually setting the flags.
Note
Setting on_epoch=True will accumulate your logged values over the full training epoch.
def training_step(self, batch, batch_idx):
    self.log('my_loss', loss, on_step=True, on_epoch=True, prog_bar=True, logger=True)
You can also use any method of your logger directly:
def training_step(self, batch, batch_idx):
    tensorboard = self.logger.experiment
    tensorboard.any_summary_writer_method_you_want())
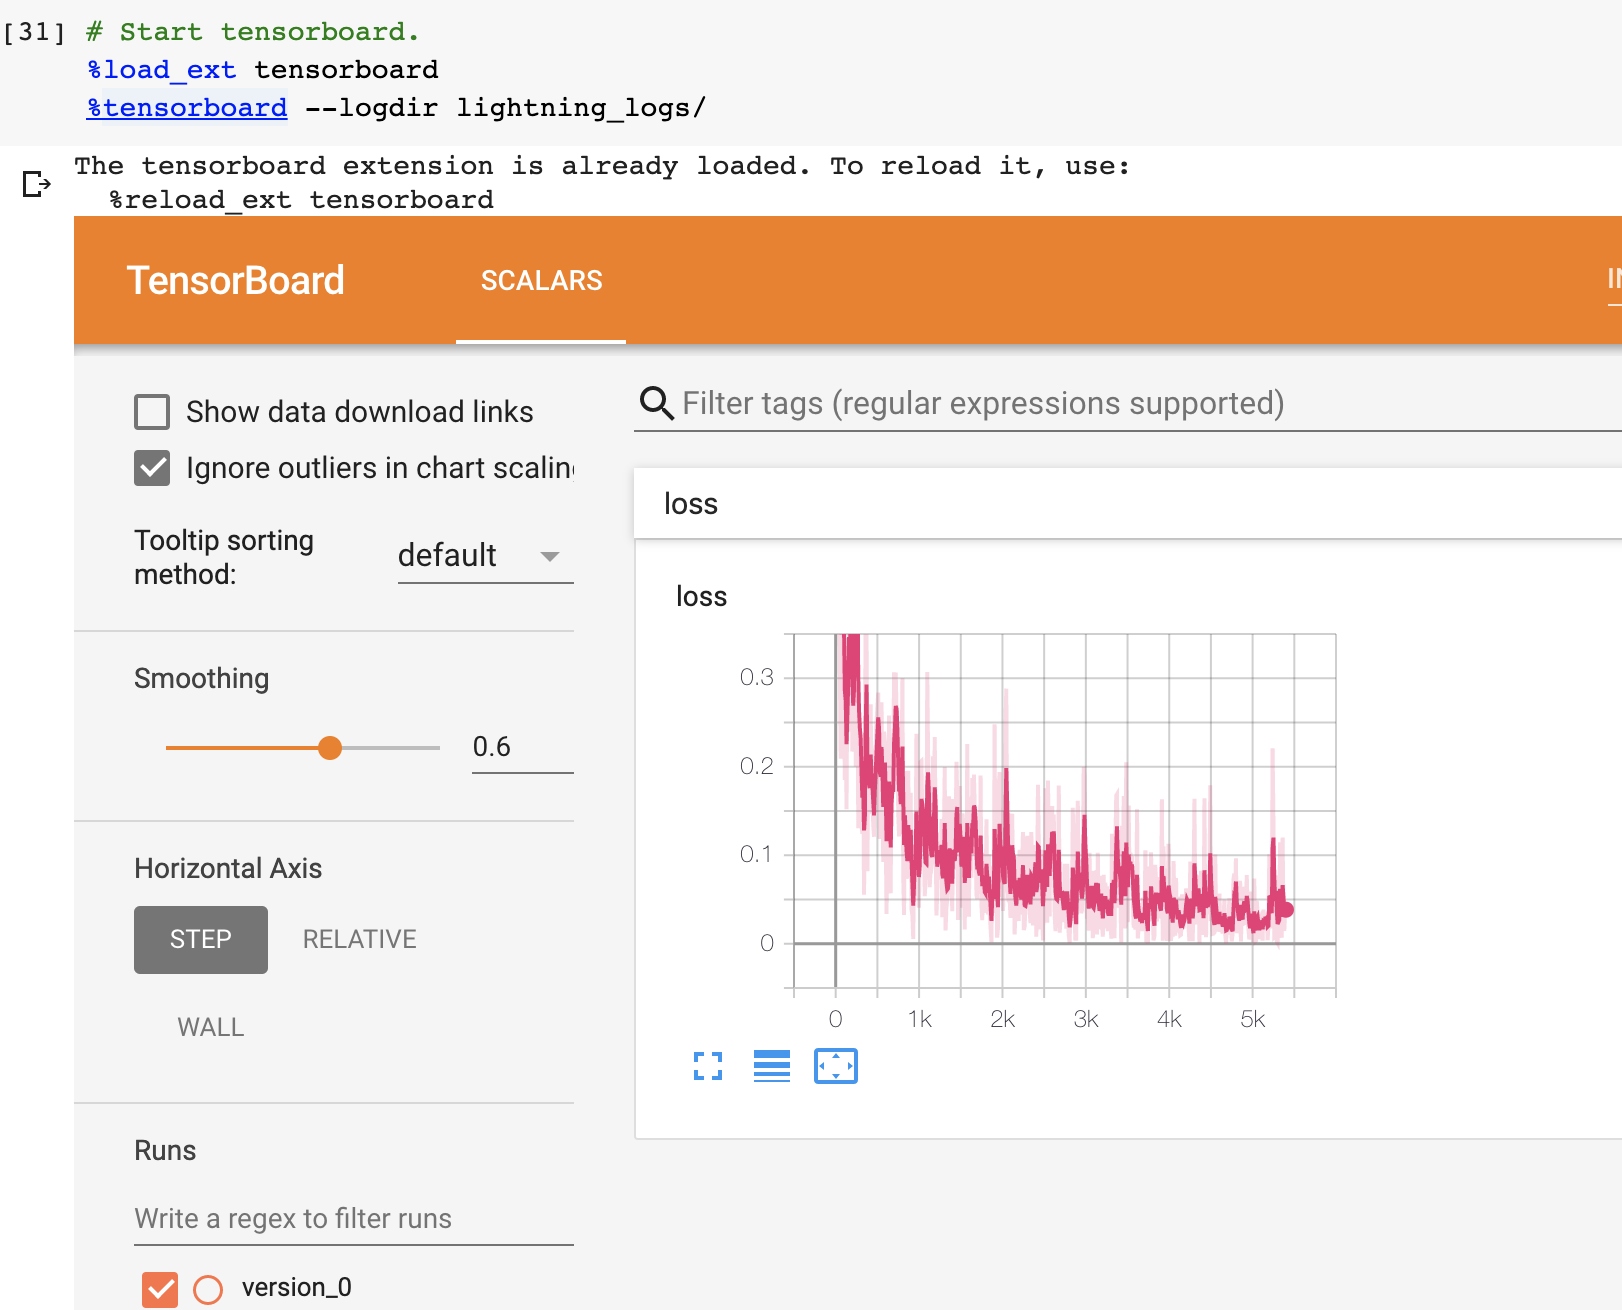
Once your training starts, you can view the logs by using your favorite logger or booting up the Tensorboard logs:
tensorboard --logdir ./lightning_logs
Which will generate automatic tensorboard logs (or with the logger of your choice).
But you can also use any of the number of other loggers we support.
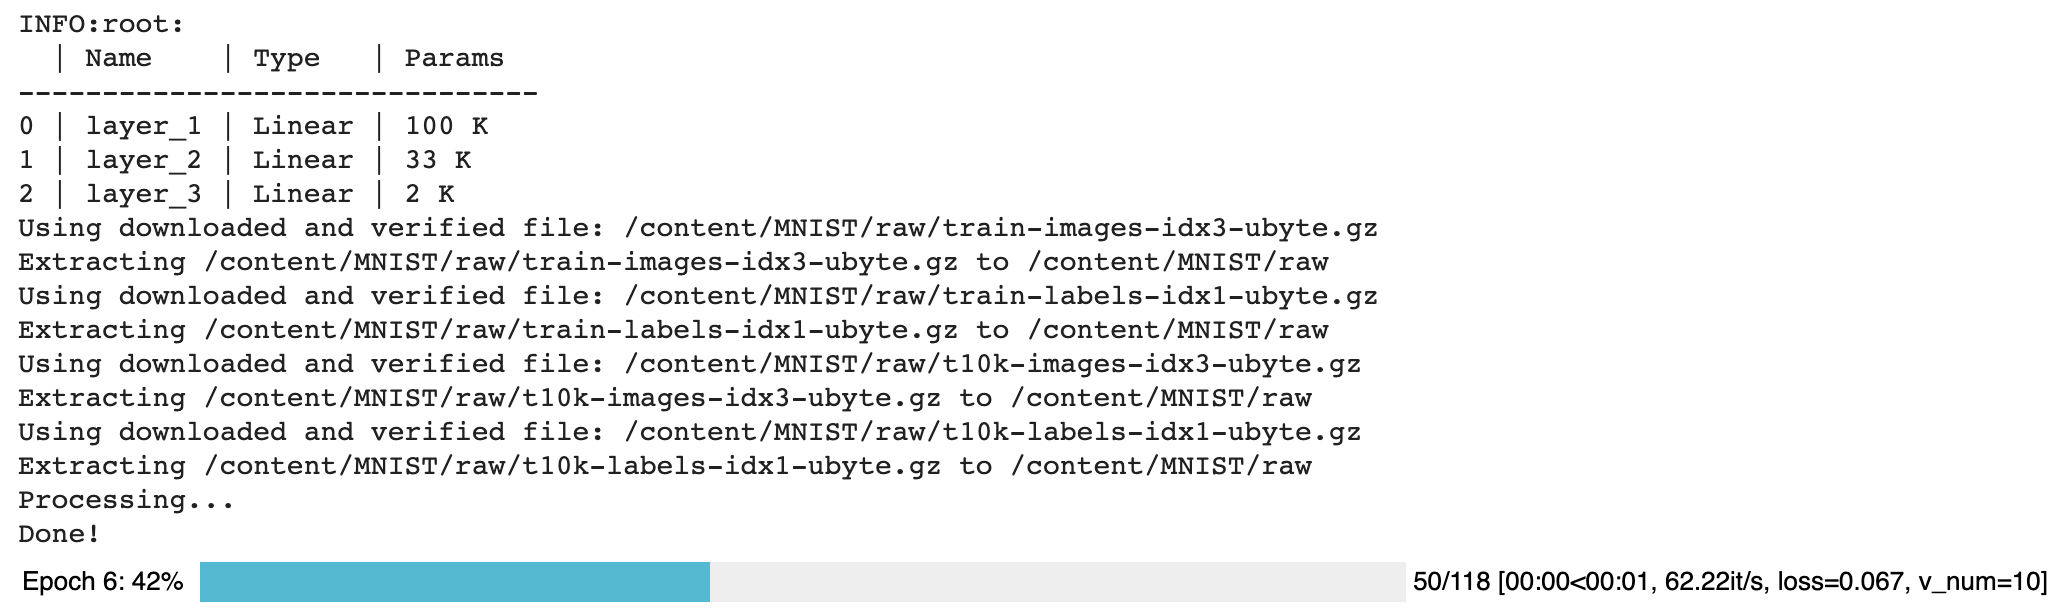
Train on CPU
from pytorch_lightning import Trainer

model = LitMNIST()
trainer = Trainer()
trainer.fit(model, train_loader)
You should see the following weights summary and progress bar

Train on GPU
But the beauty is all the magic you can do with the trainer flags. For instance, to run this model on a GPU:
model = LitMNIST()
trainer = Trainer(gpus=1)
trainer.fit(model, train_loader)

Train on Multi-GPU
Or you can also train on multiple GPUs.
model = LitMNIST()
trainer = Trainer(gpus=8)
trainer.fit(model, train_loader)
Or multiple nodes
# (32 GPUs)
model = LitMNIST()
trainer = Trainer(gpus=8, num_nodes=4, accelerator='ddp')
trainer.fit(model, train_loader)
Refer to the distributed computing guide for more details.
Train on TPUs
Did you know you can use PyTorch on TPUs? It’s very hard to do, but we’ve worked with the xla team to use their awesome library to get this to work out of the box!
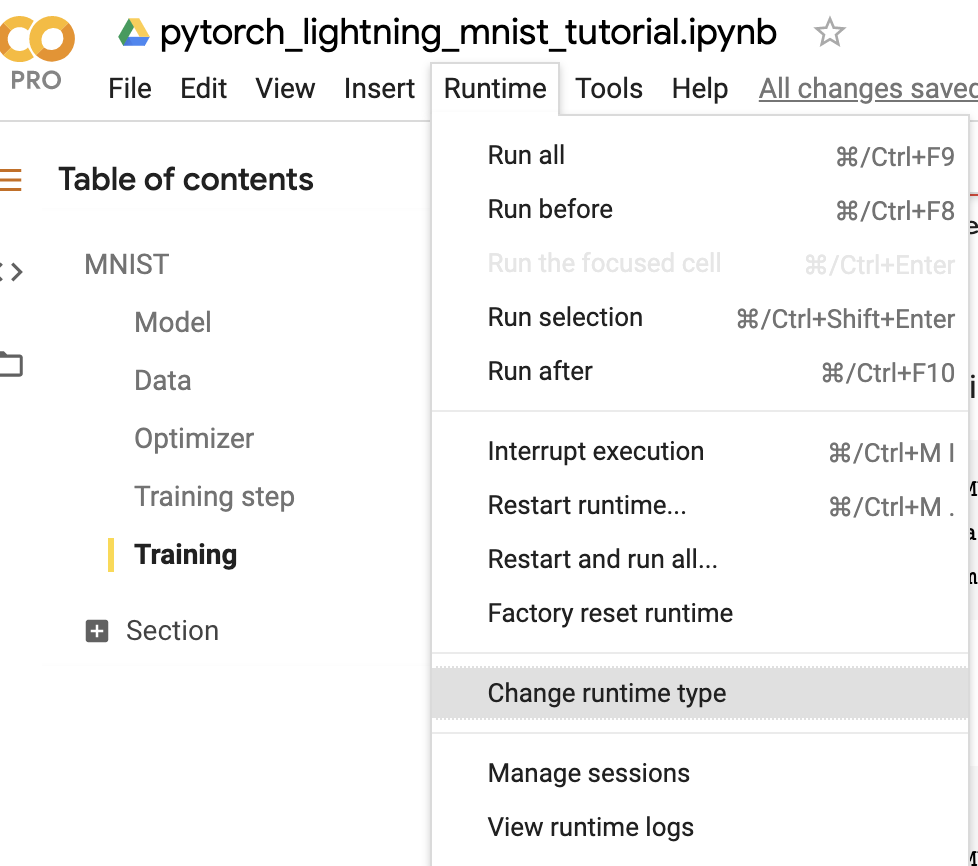
Let’s train on Colab (full demo available here)
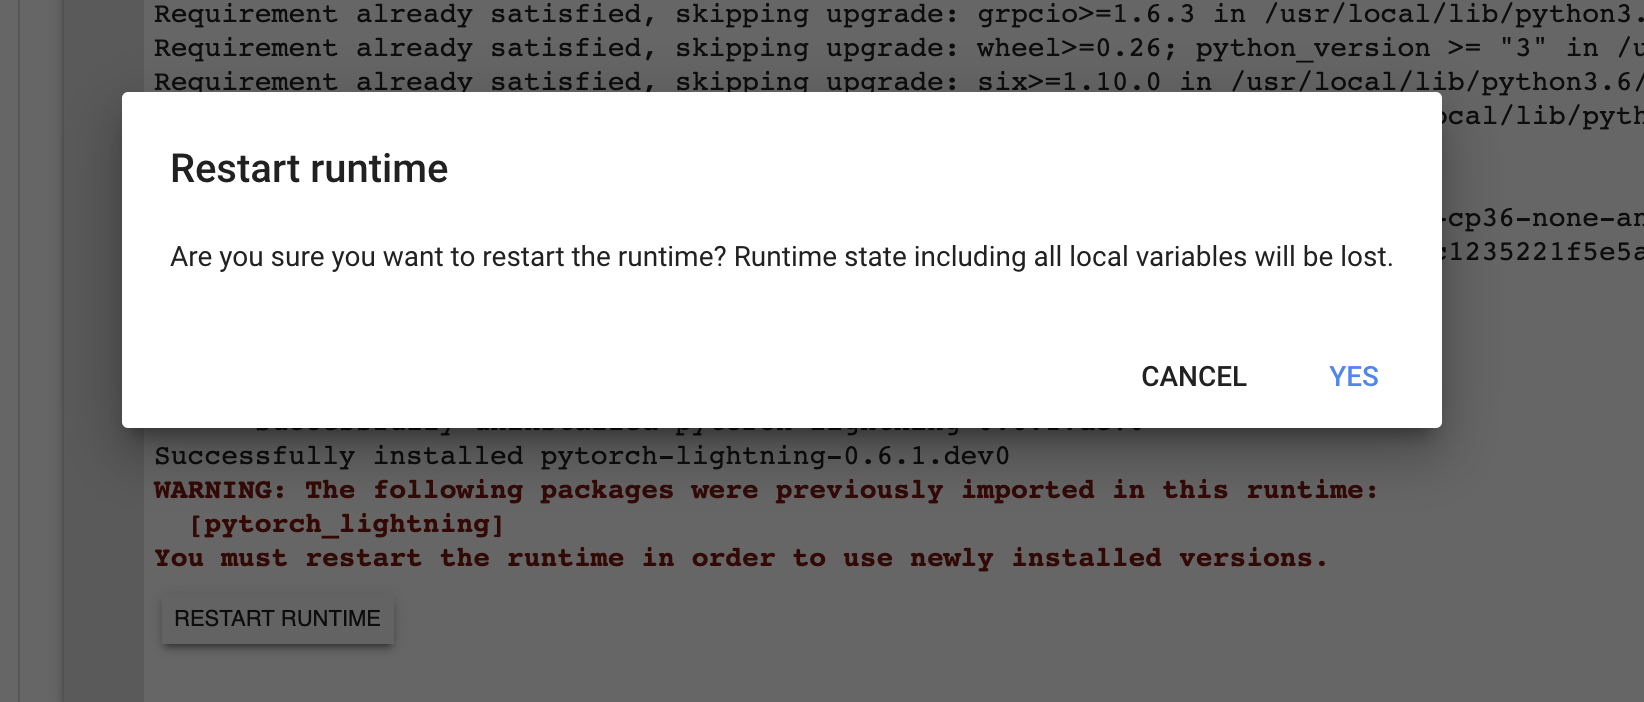
First, change the runtime to TPU (and reinstall lightning).
Next, install the required xla library (adds support for PyTorch on TPUs)
!curl https://raw.githubusercontent.com/pytorch/xla/master/contrib/scripts/env-setup.py -o pytorch-xla-env-setup.py

!python pytorch-xla-env-setup.py --version nightly --apt-packages libomp5 libopenblas-dev
In distributed training (multiple GPUs and multiple TPU cores) each GPU or TPU core will run a copy of this program. This means that without taking any care you will download the dataset N times which will cause all sorts of issues.
To solve this problem, make sure your download code is in the prepare_data method in the DataModule.
In this method we do all the preparation we need to do once (instead of on every GPU).
prepare_data can be called in two ways, once per node or only on the root node
(Trainer(prepare_data_per_node=False)).
class MNISTDataModule(LightningDataModule):
    def __init__(self, batch_size=64):
        super().__init__()
        self.batch_size = batch_size

    def prepare_data(self):
        # download only
        MNIST(os.getcwd(), train=True, download=True, transform=transforms.ToTensor())
        MNIST(os.getcwd(), train=False, download=True, transform=transforms.ToTensor())

    def setup(self, stage):
        # transform
        transform=transforms.Compose([transforms.ToTensor()])
        mnist_train = MNIST(os.getcwd(), train=True, download=False, transform=transform)
        mnist_test = MNIST(os.getcwd(), train=False, download=False, transform=transform)

        # train/val split
        mnist_train, mnist_val = random_split(mnist_train, [55000, 5000])

        # assign to use in dataloaders
        self.train_dataset = mnist_train
        self.val_dataset = mnist_val
        self.test_dataset = mnist_test

    def train_dataloader(self):
        return DataLoader(self.train_dataset, batch_size=self.batch_size)

    def val_dataloader(self):
        return DataLoader(self.val_dataset, batch_size=self.batch_size)

    def test_dataloader(self):
        return DataLoader(self.test_dataset, batch_size=self.batch_size)
The prepare_data method is also a good place to do any data processing that needs to be done only
once (ie: download or tokenize, etc…).
Note
Lightning inserts the correct DistributedSampler for distributed training. No need to add yourself!
Now we can train the LightningModule on a TPU without doing anything else!
dm = MNISTDataModule()
model = LitMNIST()
trainer = Trainer(tpu_cores=8)
trainer.fit(model, dm)
You’ll now see the TPU cores booting up.
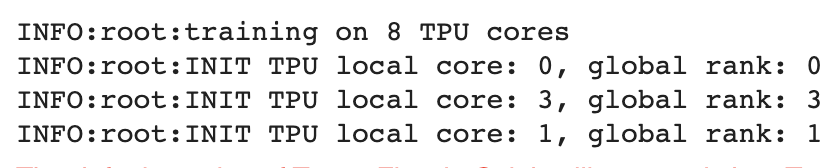
Notice the epoch is MUCH faster!
Hyperparameters
Lightning has utilities to interact seamlessly with the command line ArgumentParser
and plays well with the hyperparameter optimization framework of your choice.
ArgumentParser
Lightning is designed to augment a lot of the functionality of the built-in Python ArgumentParser
from argparse import ArgumentParser
parser = ArgumentParser()
parser.add_argument('--layer_1_dim', type=int, default=128)
args = parser.parse_args()
This allows you to call your program like so:
python trainer.py --layer_1_dim 64
Argparser Best Practices
It is best practice to layer your arguments in three sections.
Trainer args (
gpus,num_nodes, etc…)Model specific arguments (
layer_dim,num_layers,learning_rate, etc…)Program arguments (
data_path,cluster_email, etc…)
We can do this as follows. First, in your LightningModule, define the arguments
specific to that module. Remember that data splits or data paths may also be specific to
a module (i.e.: if your project has a model that trains on Imagenet and another on CIFAR-10).
class LitModel(LightningModule):

    @staticmethod
    def add_model_specific_args(parent_parser):
        parser = ArgumentParser(parents=[parent_parser], add_help=False)
        parser.add_argument('--encoder_layers', type=int, default=12)
        parser.add_argument('--data_path', type=str, default='/some/path')
        return parser
Now in your main trainer file, add the Trainer args, the program args, and add the model args
# ----------------
# trainer_main.py
# ----------------
from argparse import ArgumentParser
parser = ArgumentParser()

# add PROGRAM level args
parser.add_argument('--conda_env', type=str, default='some_name')
parser.add_argument('--notification_email', type=str, default='will@email.com')

# add model specific args
parser = LitModel.add_model_specific_args(parser)

# add all the available trainer options to argparse
# ie: now --gpus --num_nodes ... --fast_dev_run all work in the cli
parser = Trainer.add_argparse_args(parser)

args = parser.parse_args()
Now you can call run your program like so:
python trainer_main.py --gpus 2 --num_nodes 2 --conda_env 'my_env' --encoder_layers 12
Finally, make sure to start the training like so:
# init the trainer like this
trainer = Trainer.from_argparse_args(args, early_stopping_callback=...)

# NOT like this
trainer = Trainer(gpus=hparams.gpus, ...)

# init the model with Namespace directly
model = LitModel(args)

# or init the model with all the key-value pairs
dict_args = vars(args)
model = LitModel(**dict_args)
LightningModule hyperparameters
Often times we train many versions of a model. You might share that model or come back to it a few months later at which point it is very useful to know how that model was trained (i.e.: what learning rate, neural network, etc…).
Lightning has a few ways of saving that information for you in checkpoints and yaml files. The goal here is to improve readability and reproducibility.
The first way is to ask lightning to save the values of anything in the __init__ for you to the checkpoint. This also makes those values available via self.hparams.
class LitMNIST(LightningModule):

    def __init__(self, layer_1_dim=128, learning_rate=1e-2, **kwargs):
        super().__init__()
        # call this to save (layer_1_dim=128, learning_rate=1e-4) to the checkpoint
        self.save_hyperparameters()

        # equivalent
        self.save_hyperparameters('layer_1_dim', 'learning_rate')

        # Now possible to access layer_1_dim from hparams
        self.hparams.layer_1_dim
Sometimes your init might have objects or other parameters you might not want to save. In that case, choose only a few
class LitMNIST(LightningModule):

    def __init__(self, loss_fx, generator_network, layer_1_dim=128 **kwargs):
        super().__init__()
        self.layer_1_dim = layer_1_dim
        self.loss_fx = loss_fx

        # call this to save (layer_1_dim=128) to the checkpoint
        self.save_hyperparameters('layer_1_dim')

# to load specify the other args
model = LitMNIST.load_from_checkpoint(PATH, loss_fx=torch.nn.SomeOtherLoss, generator_network=MyGenerator())
Assign to self.hparams. Anything assigned to self.hparams will also be saved automatically.
# using a argparse.Namespace
class LitMNIST(LightningModule):
    def __init__(self, hparams, *args, **kwargs):
        super().__init__()
        self.hparams = hparams
        self.layer_1 = torch.nn.Linear(28 * 28, self.hparams.layer_1_dim)
        self.layer_2 = torch.nn.Linear(self.hparams.layer_1_dim, self.hparams.layer_2_dim)
        self.layer_3 = torch.nn.Linear(self.hparams.layer_2_dim, 10)
    def train_dataloader(self):
        return DataLoader(mnist_train, batch_size=self.hparams.batch_size)
Warning
Deprecated since v1.1.0. This method of assigning hyperparameters to the LightningModule will no longer be supported from v1.3.0. Use the
self.save_hyperparameters()method from above instead.You can also save full objects such as dict or Namespace to the checkpoint.
# using a argparse.Namespace
class LitMNIST(LightningModule):

    def __init__(self, conf, *args, **kwargs):
        super().__init__()
        self.save_hyperparameters(conf)

        self.layer_1 = torch.nn.Linear(28 * 28, self.hparams.layer_1_dim)
        self.layer_2 = torch.nn.Linear(self.hparams.layer_1_dim, self.hparams.layer_2_dim)
        self.layer_3 = torch.nn.Linear(self.hparams.layer_2_dim, 10)

conf = OmegaConf.create(...)
model = LitMNIST(conf)

# Now possible to access any stored variables from hparams
model.hparams.anything
Trainer args
To recap, add ALL possible trainer flags to the argparser and init the Trainer this way
parser = ArgumentParser()
parser = Trainer.add_argparse_args(parser)
hparams = parser.parse_args()

trainer = Trainer.from_argparse_args(hparams)

# or if you need to pass in callbacks
trainer = Trainer.from_argparse_args(hparams, checkpoint_callback=..., callbacks=[...])
Multiple Lightning Modules
We often have multiple Lightning Modules where each one has different arguments. Instead of
polluting the main.py file, the LightningModule lets you define arguments for each one.
class LitMNIST(LightningModule):

    def __init__(self, layer_1_dim, **kwargs):
        super().__init__()
        self.layer_1 = torch.nn.Linear(28 * 28, layer_1_dim)

    @staticmethod
    def add_model_specific_args(parent_parser):
        parser = ArgumentParser(parents=[parent_parser], add_help=False)
        parser.add_argument('--layer_1_dim', type=int, default=128)
        return parser
class GoodGAN(LightningModule):

    def __init__(self, encoder_layers, **kwargs):
        super().__init__()
        self.encoder = Encoder(layers=encoder_layers)

    @staticmethod
    def add_model_specific_args(parent_parser):
        parser = ArgumentParser(parents=[parent_parser], add_help=False)
        parser.add_argument('--encoder_layers', type=int, default=12)
        return parser
Now we can allow each model to inject the arguments it needs in the main.py
def main(args):
    dict_args = vars(args)

    # pick model
    if args.model_name == 'gan':
        model = GoodGAN(**dict_args)
    elif args.model_name == 'mnist':
        model = LitMNIST(**dict_args)

    trainer = Trainer.from_argparse_args(args)
    trainer.fit(model)

if __name__ == '__main__':
    parser = ArgumentParser()
    parser = Trainer.add_argparse_args(parser)

    # figure out which model to use
    parser.add_argument('--model_name', type=str, default='gan', help='gan or mnist')

    # THIS LINE IS KEY TO PULL THE MODEL NAME
    temp_args, _ = parser.parse_known_args()

    # let the model add what it wants
    if temp_args.model_name == 'gan':
        parser = GoodGAN.add_model_specific_args(parser)
    elif temp_args.model_name == 'mnist':
        parser = LitMNIST.add_model_specific_args(parser)

    args = parser.parse_args()

    # train
    main(args)
and now we can train MNIST or the GAN using the command line interface!
$ python main.py --model_name gan --encoder_layers 24
$ python main.py --model_name mnist --layer_1_dim 128
Validating
For most cases, we stop training the model when the performance on a validation split of the data reaches a minimum.
Just like the training_step, we can define a validation_step to check whatever
metrics we care about, generate samples, or add more to our logs.
def validation_step(self, batch, batch_idx):
    loss = MSE_loss(...)
    self.log('val_loss', loss)
Now we can train with a validation loop as well.
from pytorch_lightning import Trainer

model = LitMNIST()
trainer = Trainer(tpu_cores=8)
trainer.fit(model, train_loader, val_loader)
You may have noticed the words Validation sanity check logged. This is because Lightning runs 2 batches of validation before starting to train. This is a kind of unit test to make sure that if you have a bug in the validation loop, you won’t need to potentially wait for a full epoch to find out.
Note
Lightning disables gradients, puts model in eval mode, and does everything needed for validation.
Val loop under the hood
Under the hood, Lightning does the following:
model = Model()
model.train()
torch.set_grad_enabled(True)

for epoch in epochs:
    for batch in data:
        # ...
        # train

    # validate
    model.eval()
    torch.set_grad_enabled(False)

    outputs = []
    for batch in val_data:
        x, y = batch                        # validation_step
        y_hat = model(x)                    # validation_step
        loss = loss(y_hat, x)               # validation_step
        outputs.append({'val_loss': loss})  # validation_step

    total_loss = outputs.mean()             # validation_epoch_end
Optional methods
If you still need even more fine-grain control, define the other optional methods for the loop.
def validation_step(self, batch, batch_idx):
    preds = ...
    return preds

def validation_epoch_end(self, val_step_outputs):
    for pred in val_step_outputs:
        # do something with all the predictions from each validation_step
Testing
Once our research is done and we’re about to publish or deploy a model, we normally want to figure out how it will generalize in the “real world.” For this, we use a held-out split of the data for testing.
Just like the validation loop, we define a test loop
class LitMNIST(LightningModule):
    def test_step(self, batch, batch_idx):
        x, y = batch
        logits = self(x)
        loss = F.nll_loss(logits, y)
        self.log('test_loss', loss)
However, to make sure the test set isn’t used inadvertently, Lightning has a separate API to run tests.
Once you train your model simply call .test().
from pytorch_lightning import Trainer

model = LitMNIST()
trainer = Trainer(tpu_cores=8)
trainer.fit(model)

# run test set
result = trainer.test()
print(result)
Out:
--------------------------------------------------------------
TEST RESULTS
{'test_loss': 1.1703}
--------------------------------------------------------------
You can also run the test from a saved lightning model
model = LitMNIST.load_from_checkpoint(PATH)
trainer = Trainer(tpu_cores=8)
trainer.test(model)
Note
Lightning disables gradients, puts model in eval mode, and does everything needed for testing.
Warning
.test() is not stable yet on TPUs. We’re working on getting around the multiprocessing challenges.
Predicting
Again, a LightningModule is exactly the same as a PyTorch module. This means you can load it and use it for prediction.
model = LitMNIST.load_from_checkpoint(PATH)
x = torch.randn(1, 1, 28, 28)
out = model(x)
On the surface, it looks like forward and training_step are similar. Generally, we want to make sure that
what we want the model to do is what happens in the forward. whereas the training_step likely calls forward from
within it.
class MNISTClassifier(LightningModule):

    def forward(self, x):
        batch_size, channels, width, height = x.size()
        x = x.view(batch_size, -1)
        x = self.layer_1(x)
        x = F.relu(x)
        x = self.layer_2(x)
        x = F.relu(x)
        x = self.layer_3(x)
        x = F.log_softmax(x, dim=1)
        return x

    def training_step(self, batch, batch_idx):
        x, y = batch
        logits = self(x)
        loss = F.nll_loss(logits, y)
        return loss
model = MNISTClassifier()
x = mnist_image()
logits = model(x)
In this case, we’ve set this LightningModel to predict logits. But we could also have it predict feature maps:
class MNISTRepresentator(LightningModule):

    def forward(self, x):
        batch_size, channels, width, height = x.size()
        x = x.view(batch_size, -1)
        x = self.layer_1(x)
        x1 = F.relu(x)
        x = self.layer_2(x1)
        x2 = F.relu(x)
        x3 = self.layer_3(x2)
        return [x, x1, x2, x3]

    def training_step(self, batch, batch_idx):
        x, y = batch
        out, l1_feats, l2_feats, l3_feats = self(x)
        logits = F.log_softmax(out, dim=1)
        ce_loss = F.nll_loss(logits, y)
        loss = perceptual_loss(l1_feats, l2_feats, l3_feats) + ce_loss
        return loss
model = MNISTRepresentator.load_from_checkpoint(PATH)
x = mnist_image()
feature_maps = model(x)
Or maybe we have a model that we use to do generation
class LitMNISTDreamer(LightningModule):

    def forward(self, z):
        imgs = self.decoder(z)
        return imgs

    def training_step(self, batch, batch_idx):
        x, y = batch
        representation = self.encoder(x)
        imgs = self(representation)

        loss = perceptual_loss(imgs, x)
        return loss
model = LitMNISTDreamer.load_from_checkpoint(PATH)
z = sample_noise()
generated_imgs = model(z)
How you split up what goes in forward vs training_step depends on how you want to use this model for
prediction.
The nonessentials
Extensibility
Although lightning makes everything super simple, it doesn’t sacrifice any flexibility or control. Lightning offers multiple ways of managing the training state.
Training overrides
Any part of the training, validation, and testing loop can be modified. For instance, if you wanted to do your own backward pass, you would override the default implementation
def backward(self, use_amp, loss, optimizer):
    loss.backward()
With your own
class LitMNIST(LightningModule):

    def backward(self, use_amp, loss, optimizer, optimizer_idx):
        # do a custom way of backward
        loss.backward(retain_graph=True)
Every single part of training is configurable this way. For a full list look at LightningModule.
Callbacks
Another way to add arbitrary functionality is to add a custom callback for hooks that you might care about
from pytorch_lightning.callbacks import Callback

class MyPrintingCallback(Callback):

    def on_init_start(self, trainer):
        print('Starting to init trainer!')

    def on_init_end(self, trainer):
        print('Trainer is init now')

    def on_train_end(self, trainer, pl_module):
        print('do something when training ends')
And pass the callbacks into the trainer
trainer = Trainer(callbacks=[MyPrintingCallback()])
Tip
See full list of 12+ hooks in the Callback.
Child Modules
Research projects tend to test different approaches to the same dataset. This is very easy to do in Lightning with inheritance.
For example, imagine we now want to train an Autoencoder to use as a feature extractor for MNIST images. We are extending our Autoencoder from the LitMNIST-module which already defines all the dataloading. The only things that change in the Autoencoder model are the init, forward, training, validation and test step.
class Encoder(torch.nn.Module):
    pass

class Decoder(torch.nn.Module):
    pass

class AutoEncoder(LitMNIST):

    def __init__(self):
        super().__init__()
        self.encoder = Encoder()
        self.decoder = Decoder()
        self.metric = MSE()

    def forward(self, x):
        return self.encoder(x)

    def training_step(self, batch, batch_idx):
        x, _ = batch

        representation = self.encoder(x)
        x_hat = self.decoder(representation)

        loss = self.metric(x, x_hat)
        return loss

    def validation_step(self, batch, batch_idx):
        self._shared_eval(batch, batch_idx, 'val')

    def test_step(self, batch, batch_idx):
        self._shared_eval(batch, batch_idx, 'test')

    def _shared_eval(self, batch, batch_idx, prefix):
        x, _ = batch
        representation = self.encoder(x)
        x_hat = self.decoder(representation)

        loss = self.metric(x, x_hat)
        self.log(f'{prefix}_loss', loss)
and we can train this using the same trainer
autoencoder = AutoEncoder()
trainer = Trainer()
trainer.fit(autoencoder)
And remember that the forward method should define the practical use of a LightningModule. In this case, we want to use the AutoEncoder to extract image representations
some_images = torch.Tensor(32, 1, 28, 28)
representations = autoencoder(some_images)
Transfer Learning
Using Pretrained Models
Sometimes we want to use a LightningModule as a pretrained model. This is fine because a LightningModule is just a torch.nn.Module!
Note
Remember that a LightningModule is EXACTLY a torch.nn.Module but with more capabilities.
Let’s use the AutoEncoder as a feature extractor in a separate model.
class Encoder(torch.nn.Module):
    ...

class AutoEncoder(LightningModule):
    def __init__(self):
        self.encoder = Encoder()
        self.decoder = Decoder()

class CIFAR10Classifier(LightningModule):
    def __init__(self):
        # init the pretrained LightningModule
        self.feature_extractor = AutoEncoder.load_from_checkpoint(PATH)
        self.feature_extractor.freeze()

        # the autoencoder outputs a 100-dim representation and CIFAR-10 has 10 classes
        self.classifier = nn.Linear(100, 10)

    def forward(self, x):
        representations = self.feature_extractor(x)
        x = self.classifier(representations)
        ...
We used our pretrained Autoencoder (a LightningModule) for transfer learning!
Example: Imagenet (computer Vision)
import torchvision.models as models

class ImagenetTransferLearning(LightningModule):
    def __init__(self):
        super().__init__()

        # init a pretrained resnet
        backbone = models.resnet50(pretrained=True)
        num_filters = backbone.fc.in_features
        layers = list(backbone.children())[:-1]
        self.feature_extractor = torch.nn.Sequential(*layers)

        # use the pretrained model to classify cifar-10 (10 image classes)
        num_target_classes = 10
        self.classifier = nn.Linear(num_filters, num_target_classes)

    def forward(self, x):
        self.feature_extractor.eval()
        with torch.no_grad():
            representations = self.feature_extractor(x).flatten(1)
        x = self.classifier(representations)
        ...
Finetune
model = ImagenetTransferLearning()
trainer = Trainer()
trainer.fit(model)
And use it to predict your data of interest
model = ImagenetTransferLearning.load_from_checkpoint(PATH)
model.freeze()

x = some_images_from_cifar10()
predictions = model(x)
We used a pretrained model on imagenet, finetuned on CIFAR-10 to predict on CIFAR-10. In the non-academic world we would finetune on a tiny dataset you have and predict on your dataset.
Example: BERT (NLP)
Lightning is completely agnostic to what’s used for transfer learning so long as it is a torch.nn.Module subclass.
Here’s a model that uses Huggingface transformers.
class BertMNLIFinetuner(LightningModule):

    def __init__(self):
        super().__init__()

        self.bert = BertModel.from_pretrained('bert-base-cased', output_attentions=True)
        self.W = nn.Linear(bert.config.hidden_size, 3)
        self.num_classes = 3


    def forward(self, input_ids, attention_mask, token_type_ids):

        h, _, attn = self.bert(input_ids=input_ids,
                         attention_mask=attention_mask,
                         token_type_ids=token_type_ids)

        h_cls = h[:, 0]
        logits = self.W(h_cls)
        return logits, attn
Why PyTorch Lightning
a. Less boilerplate
Research and production code starts with simple code, but quickly grows in complexity once you add GPU training, 16-bit, checkpointing, logging, etc…
PyTorch Lightning implements these features for you and tests them rigorously to make sure you can instead focus on the research idea.
Writing less engineering/bolierplate code means:
fewer bugs
faster iteration
faster prototyping
b. More functionality
In PyTorch Lightning you leverage code written by hundreds of AI researchers, research engs and PhDs from the world’s top AI labs, implementing all the latest best practices and SOTA features such as
GPU, Multi GPU, TPU training
Multi-node training
Auto logging
…
Gradient accumulation
c. Less error-prone
Why re-invent the wheel?
Use PyTorch Lightning to enjoy a deep learning structure that is rigorously tested (500+ tests) across CPUs/multi-GPUs/multi-TPUs on every pull-request.
We promise our collective team of 20+ from the top labs has thought about training more than you :)
d. Not a new library
PyTorch Lightning is organized PyTorch - no need to learn a new framework.
Switching your model to Lightning is straight forward - here’s a 2-minute video on how to do it.
Your projects WILL grow in complexity and you WILL end up engineering more than trying out new ideas… Defer the hardest parts to Lightning!
Lightning Philosophy
Lightning structures your deep learning code in 4 parts:
Research code
Engineering code
Non-essential code
Data code
Research code
In the MNIST generation example, the research code would be the particular system and how it’s trained (ie: A GAN or VAE or GPT).
l1 = nn.Linear(...)
l2 = nn.Linear(...)
decoder = Decoder()

x1 = l1(x)
x2 = l2(x2)
out = decoder(features, x)

loss = perceptual_loss(x1, x2, x) + CE(out, x)
In Lightning, this code is organized into a LightningModule.
Engineering code
The Engineering code is all the code related to training this system. Things such as early stopping, distribution over GPUs, 16-bit precision, etc. This is normally code that is THE SAME across most projects.
model.cuda(0)
x = x.cuda(0)

distributed = DistributedParallel(model)

with gpu_zero:
    download_data()

dist.barrier()
In Lightning, this code is abstracted out by the Trainer.
Non-essential code
This is code that helps the research but isn’t relevant to the research code. Some examples might be:
Inspect gradients
Log to tensorboard.
# log samples
z = Q.rsample()
generated = decoder(z)
self.experiment.log('images', generated)
In Lightning this code is organized into Callback.
Data code
Lightning uses standard PyTorch DataLoaders or anything that gives a batch of data. This code tends to end up getting messy with transforms, normalization constants, and data splitting spread all over files.
# data
train = MNIST(...)
train, val = split(train, val)
test = MNIST(...)

# transforms
train_transforms = ...
val_transforms = ...
test_transforms = ...

# dataloader ...
# download with dist.barrier() for multi-gpu, etc...
This code gets especially complicated once you start doing multi-GPU training or needing info about the data to build your models.
In Lightning this code is organized inside a LightningDataModule.
Tip
DataModules are optional but encouraged, otherwise you can use standard DataLoaders
